OK long time no post. That’s my bad. I have been busy rolling out Cisco Catalyst switching for a campus network refresh. Which reminds me, I haven’t done a post on Catalyst stacking cables and how to configure the pattern and layout so here goes.
This process is pretty universal. I use this stacking configuration layout on 3750X, 3850 and 9300 Catalyst platforms. It provides redundancy for each switch in the stack and allows you to remove or add a switch without bringing the rest of the stack down.
Stacking Notes
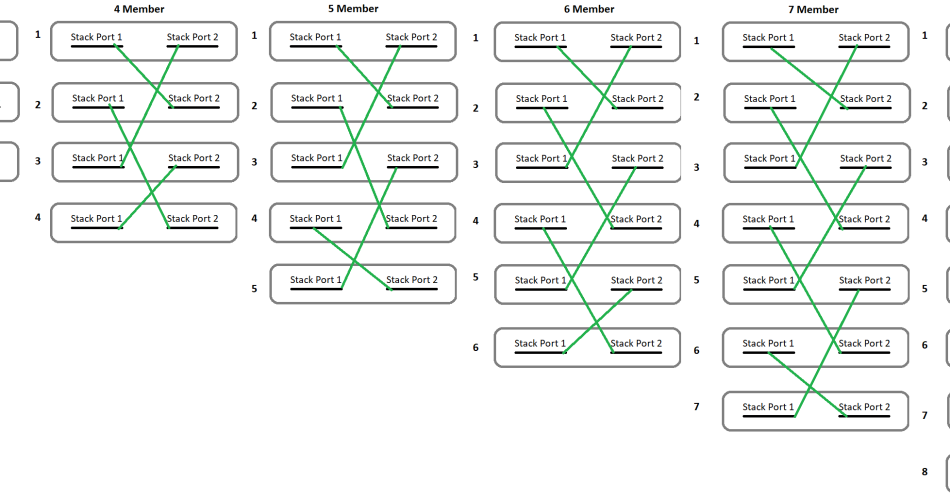
1. Cisco Catalyst switching supports a max of 8 switches stacked. Keep that in mind. This layout applies to switch stacks the size of 3 to 8 members.
2. Every stacking port cross over – meaning from Port 1 to 2 or from 2 to 1 – no matter the switch member. In this config always cross over.
3. No matter how many members in the stack – the first and last switch will cable to the adjacent switch for one of its ports (crossed over).
3. Start at Switch 1. Switch 1 Stack Port 1, this will cross over to Switch 2 Stack port 2. Always.
4. This stacking layout allows you to use the 50cm Cisco stacking cables up to 8 members. Cisco no longer bundle the stacking cable in the SKU, the longer the cable the more expensive. So this stacking layout is also cheaper.
Here is a diagram that details the stacking layout for stack sizes 3 through to 8.
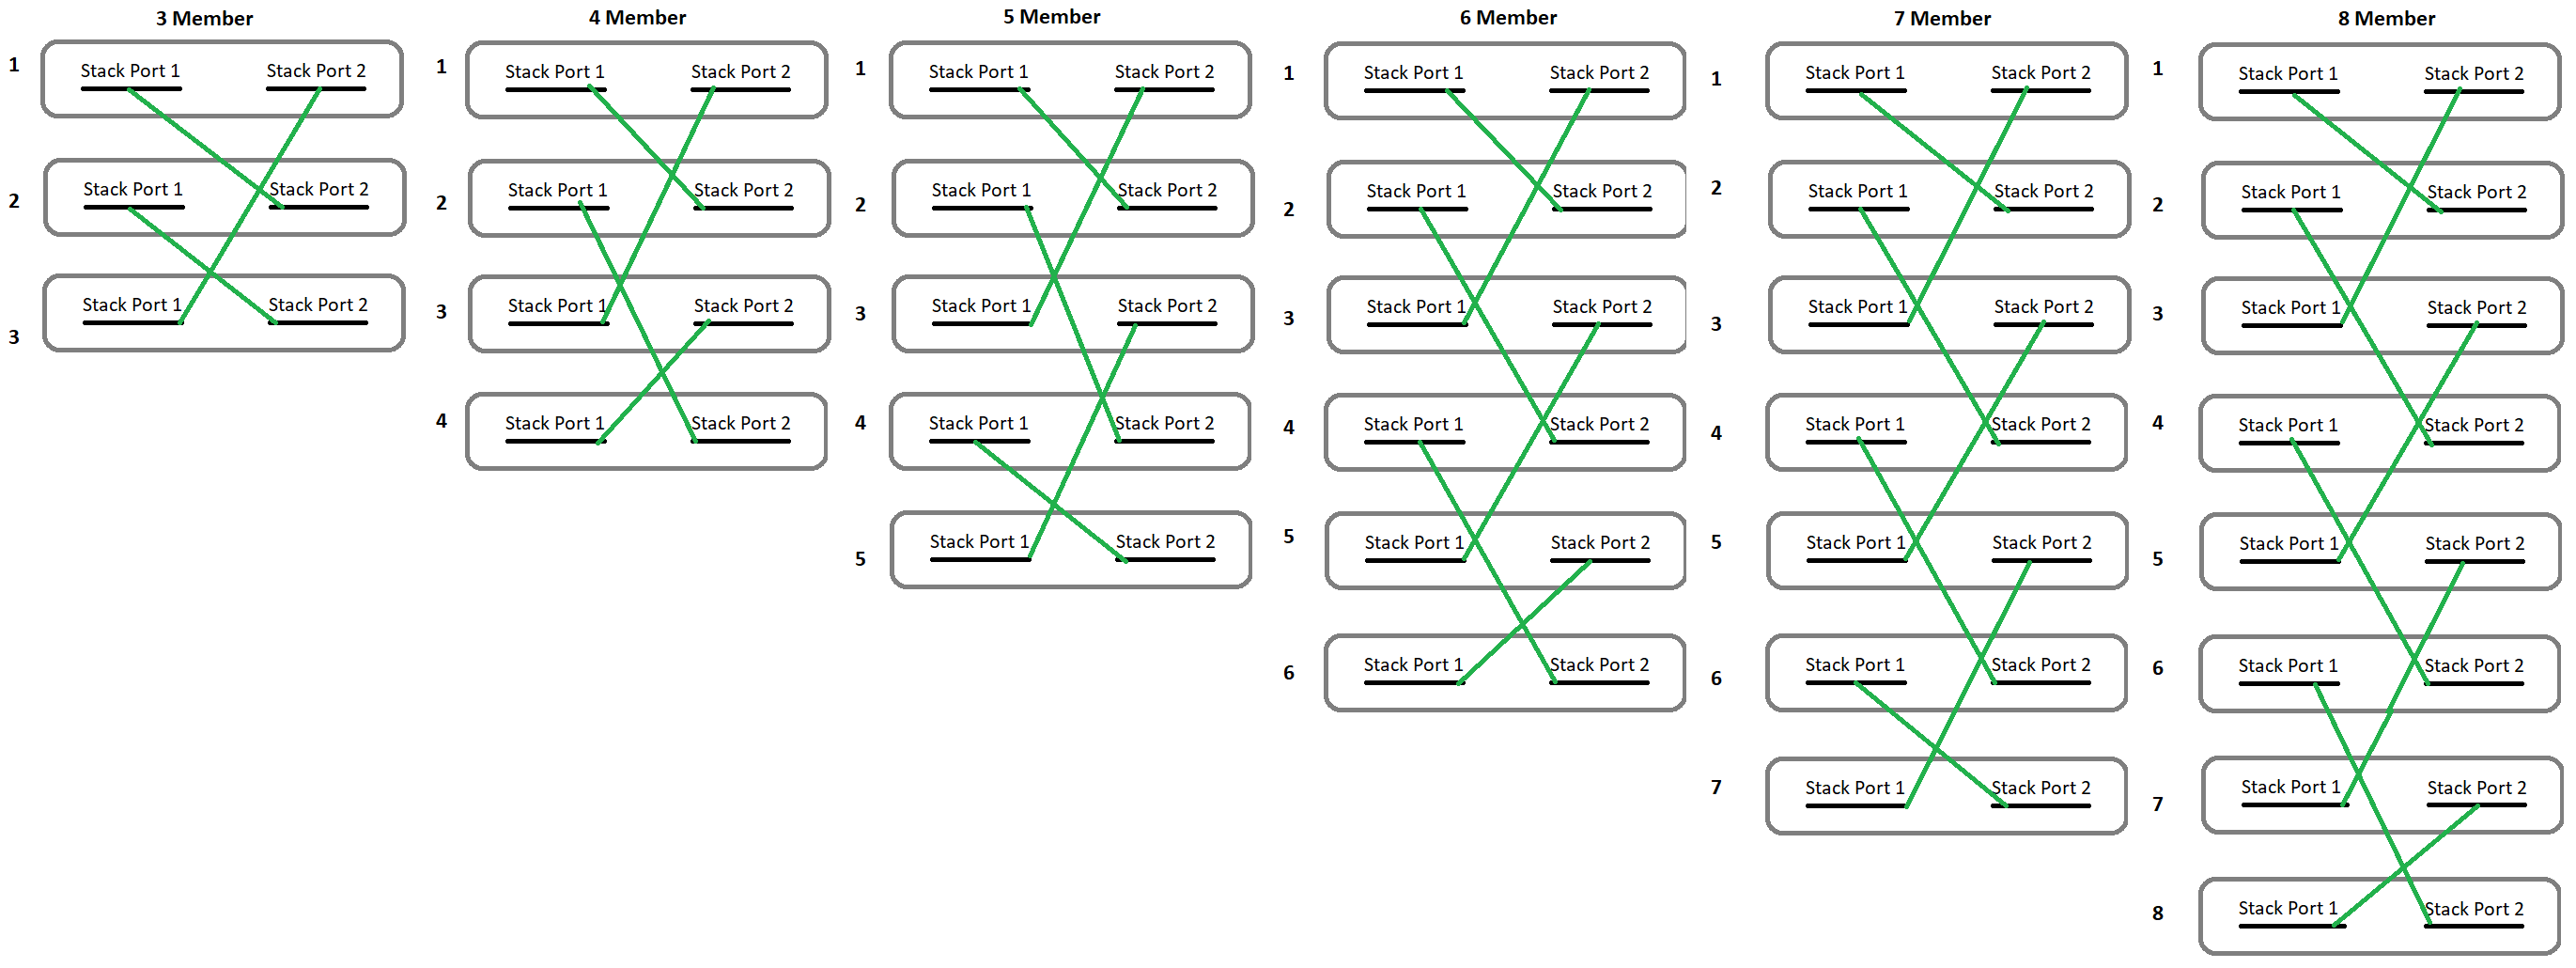
As you can see the first switch in each stack goes from S1 port 1 to S2 port 2. Depending on the stack size (odd or even) determines which ports the last two switches connect. All other ports cross over “skipping” a switch.
It’s a pattern that once you become familiar with, is easy to use and you can detach any one stacking port and all members will stay up.
Now enough stalling, get to stacking your Catalyst!
Comments